Mk1 interceptor- Some Photos
Mk1 interceptor- Some Photos
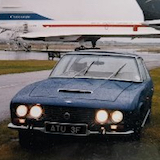
Some photos of sills and wheel arch repairs - still in need of final touches. lots of time spent removing previous shoddy work - wrong sill contour fitted on one side, excessive filling, rust, etc. New stainless exhaust fitted (sounds great), Hard slog but gradually getting there - rear valance repairs next as previous owner must have revered it into something hard.
- Attachments
-
- IMG_0626.jpg (142.82 KiB) Viewed 13963 times
-
- IMG_0619.jpg (61.86 KiB) Viewed 13963 times
-
- IMG_0618.jpg (104.68 KiB) Viewed 13963 times
-
- IMG_0646.jpg (118.87 KiB) Viewed 13963 times
-
- IMG_3026.JPG (124.17 KiB) Viewed 13963 times
-
- IMG_3027.JPG (148.13 KiB) Viewed 13963 times
-
- IMG_3086.JPG (95.3 KiB) Viewed 13963 times
-
- IMG_3066.JPG (143.55 KiB) Viewed 13963 times
-
- IMG_3061.JPG (126.02 KiB) Viewed 13963 times
-
Chris_R

- JOC General Secretary
- Posts: 6576
- Joined: Sun Feb 10, 2008 9:19 am
- Location: South West London
Re: Mk1 interceptor- Some Photos
Having seen this car before you bought it I am quite frankly astonished at the progress and the change. When do you sleep?
Chris
JOC Member 6116
--------------------------------------------------
JOC Member 6116
--------------------------------------------------
Re: Mk1 interceptor- Some Photos
Thanks Chris. Started working again on this car in my spare. Usual replacement of cogs for the window motors. Welding and repair work completed on both sides and rears. Now onto the front and doors. Bonnet and swage lines very decent but have rust to address at front lower valance and on lower / bottom section of one door. Replaced loads of filler with solid metal. Interior leather very good and solid apart from one seat that has a nasty tear. Inspired by Mr S Turner, I have started working on the leather but aiming to do minimum as I want to keep it looking original by only cleaning and restore the colour albeit that they have darkened over time. This is especially the case on the handles and I am in two minds whether I should sand the leather down and recolour.
Karan
Karan
- Attachments
-
- IMG_2021.JPG (105.22 KiB) Viewed 13825 times
-
- IMG_2019.JPG (136.75 KiB) Viewed 13825 times
-
- IMG_1955.JPG (105.07 KiB) Viewed 13825 times
-
- IMG_2004.JPG (97.81 KiB) Viewed 13825 times
Re: Mk1 interceptor- Some Photos
Hi Karan,
If it helps, from my experience I think a lot of those darker marks will come out with cleaning with a water based cleaner. Most look like hand grease marks to me. I wouldn't sand it. I'd also remove the handle and clean that separately. This might need a light sand if it's damaged.
I'd imagine if you did this you'd end up with some light and dark areas on the door card - possibly some bare leather too. But if the surface and grain look good, I wouldn't take all the colour off. Just rag on a coat of colour. Then Id spray areas of bold or dark colour to even out the look. Then when dry maybe one more light coat with a rag and/or spray. The trick is stopping before you put too much on. Less is definitely better so it's all about even coverage with as few layers as possible.
The door handle may need a few more coats as it has the greatest wear.
One thing I've learnt is it can take months to dry out seats in normal conditions after a major clean. The leather might dry quickly, but the underlying dunlopillo will soak it up and retain the water on a seat. Hence you can get effervescence on the top surface after a month or so as it fully dries out. Not really an issue on door cards though.
Before I forget, if those ashtrays are stiff, don't try and open them normally. Rather, put some thin plastic against each side and lever. Those ashtray lids easily bend. Good Luck!
-
Kevin Birch

- Posts: 1576
- Joined: Thu May 22, 2014 10:07 pm
- Location: UK
Re: Mk1 interceptor- Some Photos
If you can get a small sample of leather off a seat/ door card with the original colour, Furniture Clinic will match it and supply a restore kit which works wonders. They can supply a kit to repair tears in leather too, I've just done my passenger seat which had a 2" tear in it, and has come up really nice, but not looking like new, still showing some of the creases, but am very happy and the colour match is spot on. The kit is just over £100 for a Jensen but includes everything you need including a mini air spray gun, to do the whole interior. https://www.furnitureclinic.co.uk/Leather_Colourant_Kit
My Toys: Lotus Cortina MK2.RangeRover P38, Yam inflatable, Saab 9-3 Convertible.
Mk1 Interceptor, 115/3067
Mk1 Interceptor, 115/3067
Re: Mk1 interceptor- Some Photos
The front lower valance was in poor shape, so I cut it out and welded in lower section whilst maintaining the recess in the panel for lights. Hard graft but felt it was the way to go. It is only when you get stuck in that you realise the sale of work involve in getting rid of rusty sections. Will get onto lower section of the door panels and by the side vents next. Plus, I did read somewhere on the forum on how to service the air compressor for the horn so will try and locate the thread. hey ..ho..
Karan
Karan
- Attachments
-
- MK1_2.jpg (127.82 KiB) Viewed 13566 times
-
- MK1_1.jpg (70.35 KiB) Viewed 13566 times
-
Martin R
- Posts: 5942
- Joined: Sun Jul 16, 2006 11:04 pm
- Location: Chipping Norton, & Sydney Australia
Re: Mk1 interceptor- Some Photos
Nice work 
Some air compressors for the air horns, if a later version, appear not to be user serviceable but, you'll still be able to squirt in some oil. Just remember to then run the compressor with something over the outlet to catch all of the oil which will spray out (don't ask me how I know )
)
Some air compressors for the air horns, if a later version, appear not to be user serviceable but, you'll still be able to squirt in some oil. Just remember to then run the compressor with something over the outlet to catch all of the oil which will spray out (don't ask me how I know
FF MK1 119/100
Interceptor MK3 136/8514
JOC Member 8905
Interceptor MK3 136/8514
JOC Member 8905
Re: Mk1 interceptor- Some Photos
Thanks Martin, will get all the crappy paint off it and off it’s plastic tubes first. I think all of it should be red but there is some blue on some of it and the car was never blue. Don’t ask me why I am trying to keep / get these as installed when I have had to replace/ repair many panels.
Karan
Karan
-
Kevin Birch
- Posts: 1576
- Joined: Thu May 22, 2014 10:07 pm
- Location: UK
Re: Mk1 interceptor- Some Photos
Hi Karan, the thread for air horns is here https://www.joc.org.uk/forum/viewtopic.php?f=4&t=28496
Good work on the front panel, I wasn't aware there was a recess until Stuart valued my car last year, and pointed out I still had the correct front panel. Have yet to see another MK1 with this feature, as most have had the panel replaced, without the recesses in. Of the 6 at last year's international in Malvern, mine was the only one with them, and it does look better, so well worth the effort.
Good work on the front panel, I wasn't aware there was a recess until Stuart valued my car last year, and pointed out I still had the correct front panel. Have yet to see another MK1 with this feature, as most have had the panel replaced, without the recesses in. Of the 6 at last year's international in Malvern, mine was the only one with them, and it does look better, so well worth the effort.
My Toys: Lotus Cortina MK2.RangeRover P38, Yam inflatable, Saab 9-3 Convertible.
Mk1 Interceptor, 115/3067
Mk1 Interceptor, 115/3067
Re: Mk1 interceptor- Some Photos
Update - lower front valance now welded on with the recess for lights retained. Still some tidying up to do around this area but will be moving onto the lower sections of the doors next.
Karan
Karan
- Attachments
-
- IMG_2899.JPG (131.23 KiB) Viewed 13334 times
-
- IMG_2900.JPG (107.62 KiB) Viewed 13334 times
-
- IMG_2904.JPG (79.56 KiB) Viewed 13334 times
-
- IMG_2910.JPG (78.45 KiB) Viewed 13334 times
-
- IMG_2918.JPG (96 KiB) Viewed 13334 times
-
- IMG_2908.JPG (101.73 KiB) Viewed 13334 times
Re: Mk1 interceptor- Some Photos
I think those door cards are fantastic. The door handles are brilliant. I don't know how you got them like that, handles are the worst part to do as we all know. Red is incredibly difficult to match and restore as you have found out. It is nice to see the original factory stitching on door handles. I really don't think it is humanly possible to improve that door card further, at least from the photos. In my view, you shouldn't get marked down in a concourse for that. I also like the way you have cleaned up the paint on the bonnet and wing tops, no gouges into the metal where someone got carried away with a sander, all lovely. The most important part of a car when driving is the bonnet, and the drivers view over the wing tops. Hopefully you have a dehumidifier or something to keep that nice if it is not painted already.
If you were the executive type, using the car as a daily drive and not babying it, What would make a nice display in the house, is the original door handles, a patinated front Jensen badge, old set of keys, maybe a speedo, and original green logbook. You then have the new keys, new logbook, new door handles from ReJen on the car for the daily driver use. However, there is always risk that the handles get separated from the car and mixed up.
If you were the executive type, using the car as a daily drive and not babying it, What would make a nice display in the house, is the original door handles, a patinated front Jensen badge, old set of keys, maybe a speedo, and original green logbook. You then have the new keys, new logbook, new door handles from ReJen on the car for the daily driver use. However, there is always risk that the handles get separated from the car and mixed up.
Have you seen our stolen Jensen FF 119/011 https://twitter.com/jensenffdotcom
Re: Mk1 interceptor- Some Photos
Thanks for comment John.
Did some more work this weekend as passenger side door had some rust so cut it out and welded new section in plus filled up holes on fenders where wing mirrors were located. Will be looking for door mirror mirrors, I have two sets of new tex mirrors but I don’t like the field of view if I mounted them on side of the doors. Ideally, I would like to install mirrors on the ledge by the long chrome strip close ( it’s a very narrow width for the base of the two tex mirrors) to the window. I have two beautiful long base curved Wingard stems but the chrome is not great and only one Wingard mirror - I just can’t find a similar Wingard mirror on the internet. Once mirrors are sorted, I will need to find someone to retrim the rather large Golde sunroof.
Karan
- Attachments
-
- EBD3C72B-53BF-447E-9B7D-DBD9A22E55CD.jpeg (163.17 KiB) Viewed 13142 times
-
- EC6A4490-8E9A-434F-BF8C-B1E010BEF947.jpeg (101.83 KiB) Viewed 13142 times
-
- 288960D5-E400-4751-B1B4-65832A18C06D.jpeg (169.53 KiB) Viewed 13142 times
Re: Mk1 interceptor- Some Photos
I like the Mk 1 without mirrors. Look back a lot.
Have you seen our stolen Jensen FF 119/011 https://twitter.com/jensenffdotcom
Re: Mk1 interceptor- Some Photos
Inside of doors sorted along with voxson speakers/fixing plate- gradually tackling these bits. Apprehensive about tackling the roof opening - it is not Webasto but Golde unit. The top vinyl needs replacing.
- Attachments
-
- 2989B7A2-CC8F-494A-B69E-C223CA6AAF59.jpeg (145.21 KiB) Viewed 12944 times
-
- 744019D6-6752-4E6B-8BB9-102903CF5AD6.jpeg (89.79 KiB) Viewed 12944 times
-
Chris_R
- JOC General Secretary
- Posts: 6576
- Joined: Sun Feb 10, 2008 9:19 am
- Location: South West London
Re: Mk1 interceptor- Some Photos
I know there's a fair bit of work been done but I think overall you got a really good buy there.
Chris
JOC Member 6116
--------------------------------------------------
JOC Member 6116
--------------------------------------------------